Monday, May 14, 2012

Week 20, Year 3: It (Frantically) Begins


My third season of gardening has officially begun. To keep things interesting, this season's opener had a few curve balls. I had only one weekend to plant my garden because my husband and I will be on vacation the last two weeks of May and with the beautiful weather we've been having, everything will surely be picked over by the time we get back. This created a few challenges.

Problem? That weekend was Mother's Day. Solution? Plant two gardens in one day at a remote location (Parent's house approx 80 mins away). Result? Hilarity.

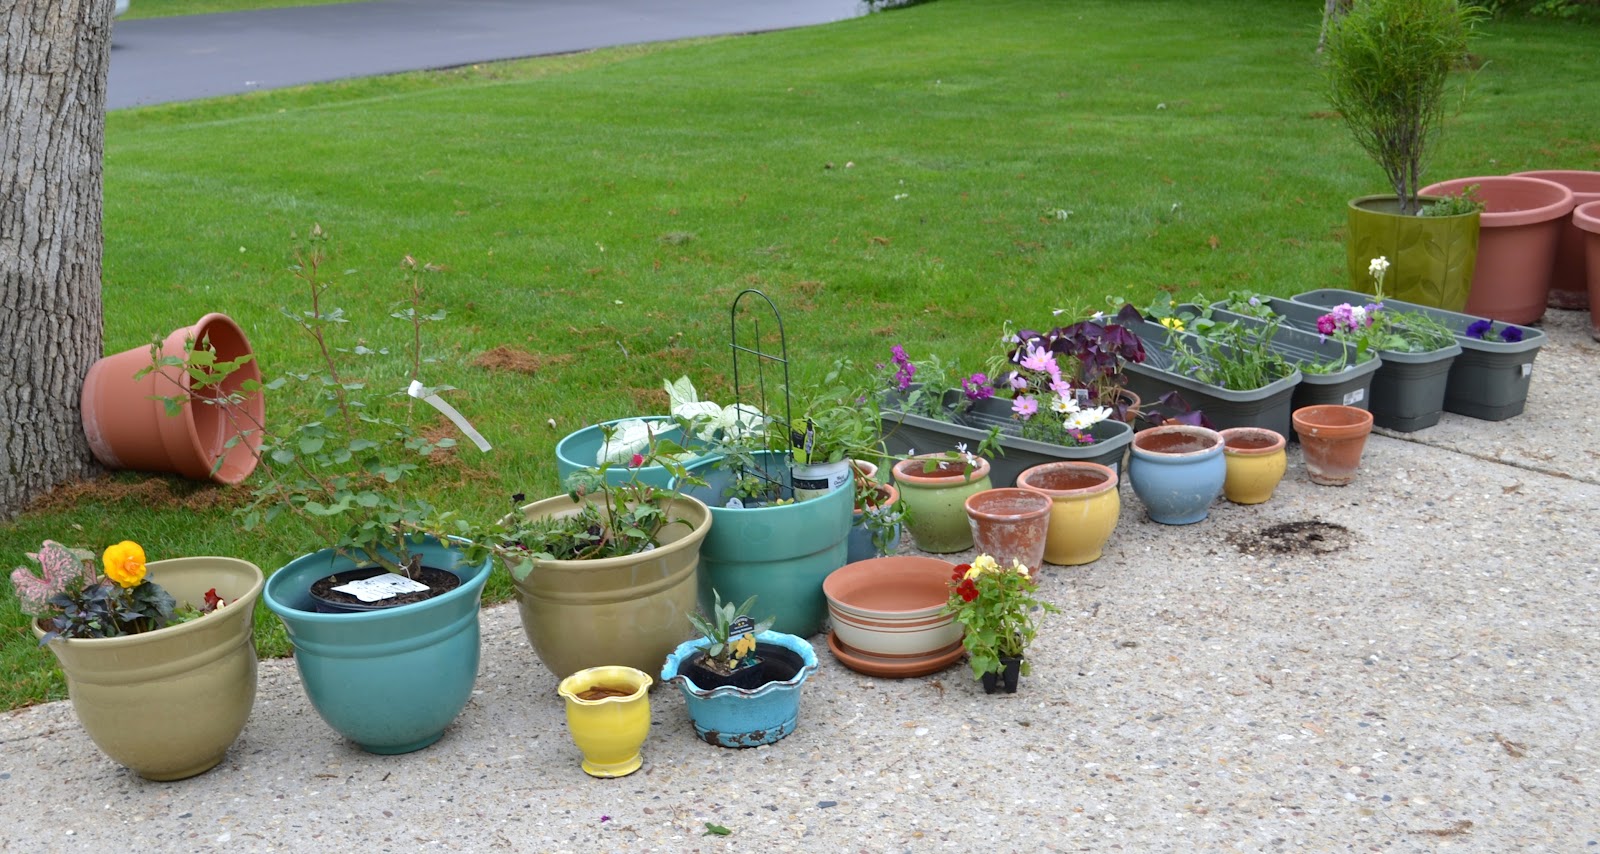
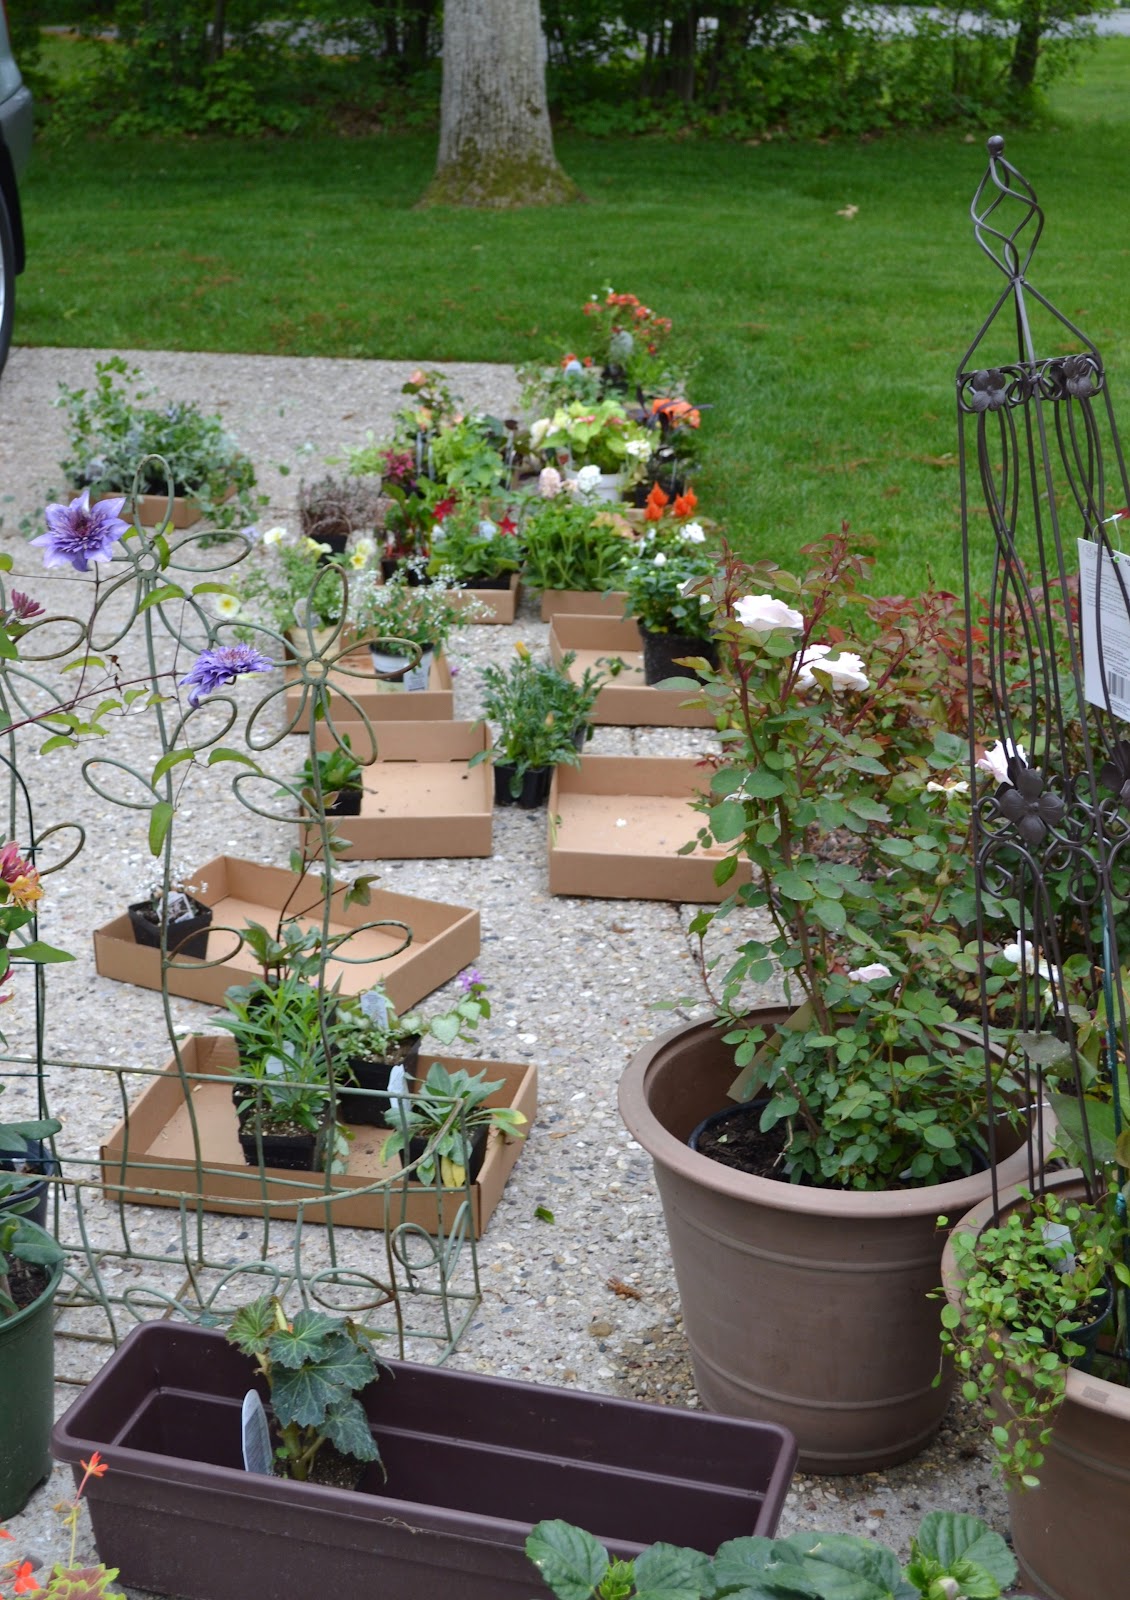
My Mom's Containers


My Containers

So, this weekend, I planted containers for my mom and myself at my parent's place in Lake Geneva. I brought all of my containers from home, but purchased everything else locally. My dad and husband spent a hectic Saturday morning driving me around as I interviewed my mom on her preferences (white, pink and red), picked up the basics at Lowe's (i.e., dirt, pots, feed) and loaded up on flowers from the local greenhouse, Pesche's (getting lost in the aisles while frantically googling flowers I didn't recognize on my phone and picking up a bit of everything in self-defeat when my time ran out).  Then, we took a quick break to have a Mother's Day lunch with my grandparents, leaving me approximately six hours to plant everything before our dinner reservations at 9pm. (Are you still following this?)

By 7pm, I was done, for better or worse. 

Better?
  • I learned about a lot of plants I had never seen or considered before
  • I got to spend some quality time with my family
  • I got to use a hose, which is far more efficient than 8 trips to the sink with a watering can.
  • I ended up with two beautiful gardens (if I do say so myself)
  • I found some bright new pots to replace my mucky old ones
  •  
Worse?
  • I have no clue what I planted. I just started sticking flower tags in pots so that I could look at it later. I have no idea if I've mixed full sun and partial shades or succulents with water lovers.
  • Lower back pain.
  • I got a nasty gash on my finger from impatiently ripping open a hose fertilizer attachment.
  • Hungry deer (requiring all of my containers to be loaded in the garage before a much needed shower)
... Oh, and we had to fit all of this (and two hyper cats) into one small SUV (or "trucklet" as my husband likes to say) ...


Believe it or not - we actually fit everything and made it back to Madison safe and sound. We even managed to bring everything up and organized it on to our deck. All in all, a fun and frenzied start to another wonderful gardening season.

 
I promise more detailed posts on my starting line up, and even a post on my mom's garden, once I recover.

Whiskers of Mass Destruction

A quick post on the amaryllis before we dive into the season's planting. We went away for a long weekend only to discover the white flower amaryllis had been mysteriously knocked off the fireplace mantle ...


.... after much investigation, we've narrowed the suspect list to two potential culprits, who may or may not have been in collusion ....

Suspect #1: Maizy

Suspect #2: Penny

Saturday, April 28, 2012

Week 17, Year 3: Amaryllis Update

My first foray into spring bulbs is going pretty well, though there have been a couple surprises along the way.  The colder weather returned shortly after planting, and I was not seeing any growth, so I brought the amaryllis inside -- which proved to be the right decision.I was a little worried they wouldn't get enough sun on our mantle, but it turns out the indirect sunlight must be the perfect complement to amaryllis. By the third week, 5 inch tall stalks had shot out of both pots, and a bud had already formed in one of them.


Just 15 days later, the plants had soared to 18 inches tall and we had bright red blossoms from the first bloomer.

Plus, a surprise -- I was a bit flummoxed when I woke up one morning and saw this bud emerging from the second pot - a white and pink hybrid.


When I purchased the bulbs, they were in a bin and I assumed both would be red. So, when these white and pink variegated buds emerged, I was happily surprised.


The two bulbs looked identical in their early days, but I've learned that no two amaryllis are the same.  The red amaryllis' first bud featured four kitty corner trumpet-shaped flowers sharing a single stalk. Plus, another bud is just about to open. The white amaryllis came second, but only has one bud so far with just two opposing flowers sharing the stalk.  Neither seems to be done growing, but now that they have bloomed  it's best to keep them out of direct sunlight to keep the blooms fresh. So, it seems like the fireplace is still the right spot.

I've also learned how tall amaryllis really are. I knew from pictures they would be tall, but it's hard to imagine how tall 18-24" really is until you've seen them. My plants shot up to 24" in less than a month. Both are now listing to the right (toward the sunlight) and I'm wondering if I need to stake them. Their stalks seem pretty hardy but I would hate for them to tip or break. 


In terms of care, I would recommend these to anyone. Growing amaryllis could not be easier. They require little water when indoors and the only maintenance I've done to date was to cut the little pollen buds off the flowers just to prevent them from falling on the carpet and becoming (potentially poisonous) prey for our cats.  

Now that preseason training is done, I feel warmed up and ready to dive into the gardening season this May ...

Sunday, March 18, 2012

Week 11, Year 3: An Early Taste of Spring

Wisconsin has been blessed with temperatures of 70 degree this week. Although I had not even intended to start my garden until late May, I could not resist the early opportunity to plant. I've been busy this winter and attended my first garden show. It was pure heaven for the avid gardener and I picked up a couple of great experiments for this year's garden. I tend to stay away from bulbs and perennials because my containers do not lend themselves to winter maintenance. However, I decided to venture into unchartered territory and picked up two bulbs. I had intended to plant them in April, but I was too eager to make use of the early sunshine that I planted them this weekend.

One of my favorite flowers is the Amaryllis. It is typically an early spring indoor bloomer, which is why I've stayed away from it. However, a fellow gardener told me that you can plant amaryllis anytime of year and that her mother enjoyed the blooms and foliage in her garden into late summer. So, I figured I would give it a shot. The second bulb variety was a ballerina begonia in apricot. These should be beautiful trailers in early summer.


Having never planted bulbs before, I did a little research ahead of time to settle on a game plan. I decided to plant the begonia in one pot and the amaryllis separately.

Begonias
I planted the begonia first and encountered the first problem - I wasn't sure which side was up and which side was down. The instructions stated the "pointy end" should face up, but my bulbs were more of a lima bean shape.


After a close inspection, I decided the side with little tubers coming up was "up" and it seemed like the other side had enough roots to justify making it "down".


The instructions suggested the roots needed room to grow. So, I filled about two thirds of my pot with soil and nestled the bulbs on top. I covered the bulbs and filled the rest of the pot. I finished with a good soaking.


Amaryllis


The amaryllis did not come with instructions, so I had to rely on Google. The good news was that it was clear which side was up and which was down.


However, Google suggested I needed to soak the bulbs for two hours first. Frankly, I was too eager to wait and I decided to skip the step - hopefully, I don't pay for it later. Since these bulbs were a bit further along, I nestled them a bit deeper in the soil than the begonias. I used the same organic potting mix and filled the pots to the top, following with a good soak.


Regardless of whether these bulbs succeed or fail, it was wonderful to be gardening in early March in Wisconsin. I'm sure we'll be back to blizzards in a week, but this early release from cabin fever will certainly get me through it.

Saturday, September 3, 2011

Week 35, Year 2: The Bold and the Beautiful


This color entry focuses on the bolder tones in my garden - the reds, oranges and yellows. Most professionals would criticize my overabundance of color and suggest that I stick to a couple of common themes, and believe me I tried. But, I was also intrigued by a number of bold colored flowers that I just had to try, and on a 5x5 space, you are bound to run into some color clashing. At the same time, this porch is just for fun and allows me to experiment for when I am ready to have the large and luscious gardens attached to a house, which probably will be a bit more organized when it comes to color, height and timing.

Reds

You are more likely to find me wearing red to a Badger game, than planting it in my garden, but this year saw a couple of exceptions. I just couldn't resist experimenting with the mandevilla and the fun bonfyre begonia, both of which only came in red.

Bonfyre Begonia - like an exploding firework on the 4th of July, this begonia thrived when I transplanted it from its original hanger to the base of the clematis. It shoots its fun flowers over the sides of the deck and makes a bold statement.

Mandevilla - This tropical climber thrives in humid settings, and was probably a bit risky for moody Wisconsin. A cold June set this one on a slower start, and it didn't really produce a lot of vines. However, it still produce a number of wonderful red flowers, which gradually lighten to pink with age.

Painted Tongue - a multi-colored gem that has already gotten a lot of attention on this blog for its tiger lily like markings. One of its many colors included this red variety with yellow markings. McDonalds, anyone?

Oranges

Black-Eyed Susan Vine - Last year's clear winner was this year's ultimate failure. It just never took off. It maybe produced one flower (expertly captured here), but was ultimately a disappointment. It's not even alive right now. I thought I could spark some energy by removing its trellis, but I only stunted it even more.

Flowering Maple (aka Ablution) - This flower takes its names from its leaves, which resemble the leaves of a maple tree. The flowers are a delicate salmonly orange. The variegated leaves were one of my husband's favorites, showing a yellow and chartreuse camouflage pattern. At this point in the season, it has basically overrun its box mates, so it may have better off in its own pot.


Yellows

Portulaca (aka Moss Rose) - This ugly duckling finally bloomed into a beautiful swan. In June, it had a close resemblance to Bob Marley's head, but this August it finally produced beautiful buttercup like yellow flowers. The only trick is that they seem to open and close throughout the day and I haven't been able to catch them with the buds open.

Canna - I purchased this yellow canna on a very hot day in July at the Madison Farmer's Market. It is a water lover, and I've heard that it can come back next year if I make cuttings in the fall. For now, I just appreciate its constant blooms and tiger pattern.

Painted Tongue - yellow flowers with light yellow markings were also one of the many colors that bloomed from this wonder.

Monday, August 15, 2011

Week 33, Year 2: The Clematis Files

Back to clematis. Last year's attempts were a disaster. I planted two varieties and both were fairly pathetic. One never bloomed, and the other finally produced a couple pitiful flowers after having survived my "pruning" (a.k.a. butchering). It should have been clear that clematis was not meant for my containers, yet, a glutton for punishment, I thought I would try again despite the evidence. If last year was a C, I think this year is closer to a B+/A-.

This year's hopeful is dubbed "El Presidente" and produces large purple flowers. I got smarter and bought this clematis a little later in the season, so it wouldn't whither from the cold again. It also had a couple flowers already in bloom, so I knew I would at least get to enjoy something. Clematis is supposed to bloom in early June, so I knew I didn't have much time to produce a winner. I planted it in a large container with a trellis for it to climb, instead of trying to force it around our deck spindles. I put pansies and the bonfire begonia at the bottom to keep its feet "cold." I also put it in a sunnier spot, hoping that would help force it along.


Early on, it seemed I had another failure on my hands. The flowers that had been blooming on the plant when I purchased it had wilted (see the rather pathetic drooping above), and the stems had turned a nasty shade of brown. We left for a week of vacation, and I was fearful that I would be returning to a rather nasty scene clematis wise.


However, to my surprise not all was lost in our absence. Despite the 100 degree days, there was new growth on our plant when we returned. By solstice, we had buds, which turned into a couple new blooms.


We saw another two flowers by independence day. After that, it seemed like the clematis went on hiatus again, but last week it produced another two blooms and more new growth. I'm not really sure how to interpret this, but I have reached the following conclusions:


- this variety of clematis only produces 2 flowers at a time (that or it just hates me specifically)

- the climbing trellis is a must have for a potted clematis

- always plant something exciting at the bottom to distract from any failures at the top (e.g., the spectacular begonias)

- I still don't know what I'm doing clematis wise, but I've progressed enough to justify more punishment next year

Saturday, August 13, 2011

Week 32, Year 2: The Showstopper

This year, the clear winner in my garden is the lisianthus. Lisianthus is the cultivated form of eustoma, a native prairie flower. The plant first caught my eye because it's wildflower origins suggest it is easy to grow and could be a real stunner.

Early Days: Mother's Day to Solstice


Lisianthus is a slow starter, but the results were definitely worth the wait. I planted mine in early May; splitting my plants between a mono container and sharing residence with coleus and browallia in a western facing window box. The plants started out at 3 inches, but steadily grew over 12 inches by end of June.

At one point, the leaves started to brown, and I quickly realized that I was overwatering this hardy wildflower. I also had to stake the stalks as they became too tall and started drooping.

Almost Blooming: Solstice to Independence Day


Finally, in early July, I started to note buds. However, I was startled to discover the buds were green, and not the purple that was promised on the tags. This was merely a ruse, though as the buds opened they appeared as a light lavender and gradually grew darker.


Beauties in Bloom: Independence Day to Present
After another week, the buds finally bloomed into bright purple flowers with neon green seeds in their center. The flowers most closely resemble a rose and survive for up to two to three weeks. Moreover, they make tremendous cut flowers. As in soil, the cut flowers area hardy and have lasted more than a week in my recent arrangements. Now, in mid August, my lisianthus is still blooming. I had to cut one stalk out of my potted version, but continue to see blooms on the remaining three stalks.
I am absolutely in love with the finished product and hope I can continue to plant this beautiful prairie flower in my garden for years to come.